Remote Desktop Viewer
If your question is not addressed below, contact us through our support form and we will get back to you shortly.
To get started with Remote Desktop viewer,
- Sign in to your Remote Desktop account via any browser.
- Download and install the Remote Desktop agent on the RDP-based Windows computers / servers you want to remotely access.
(Download the agent from the 'Add Computer' section of the web application. Or from the 'Downloads' page.) - Sign in to the agent software. Remote desktop access will be enabled by default.
Note: If you are signed in via web, you will be automatically signed in to the agent software.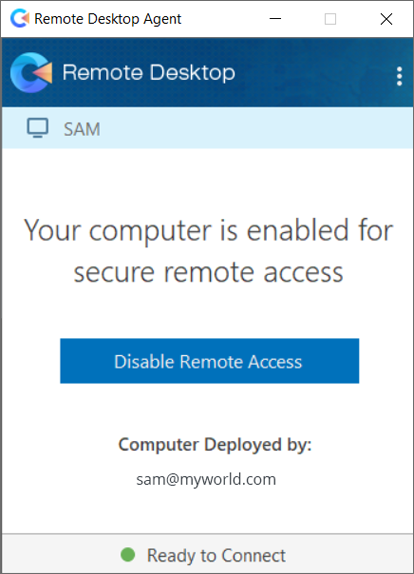
- Download and install the Remote Desktop viewer on your local computer to remotely access the computers added to your account.
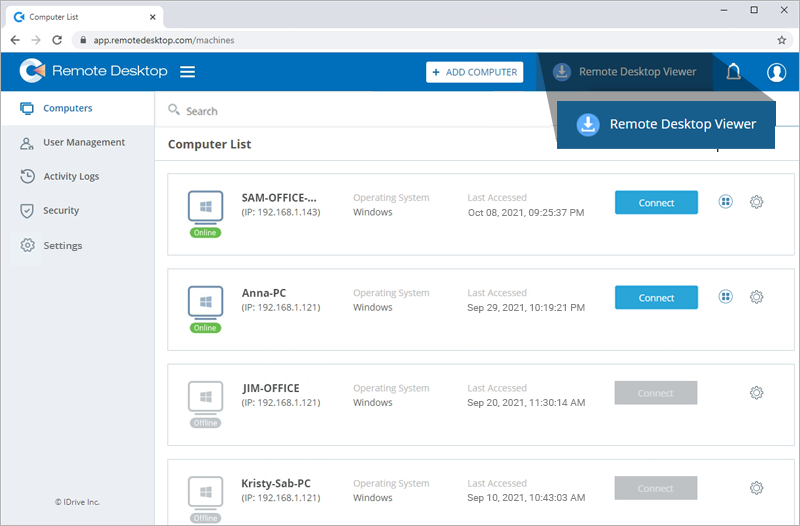
(Download the Remote Desktop viewer from the web application. Or from the 'Downloads' page.) - Sign in to the Remote Desktop viewer.
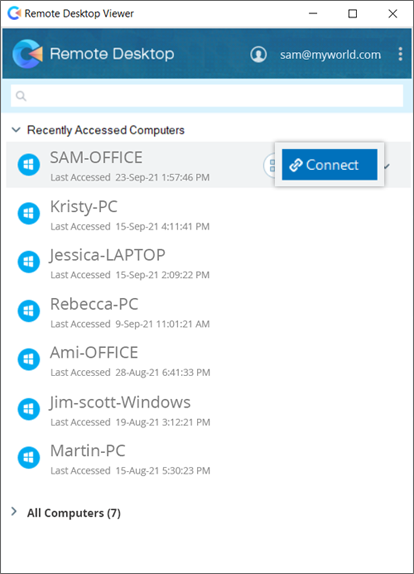
- Click 'Connect' corresponding to the remote computer or server you want to access.
- Enter your system credentials and click 'OK' to connect. Alternatively, to switch the default user account, click 'More choices', select 'Use a different account', enter the system credentials of the remote device, and click 'OK'.
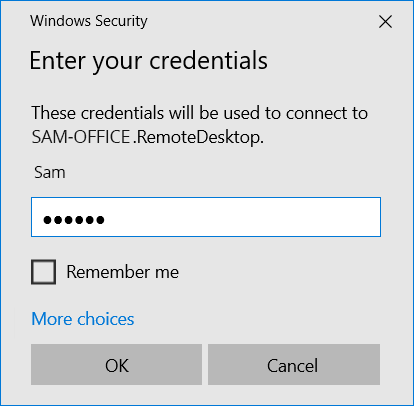
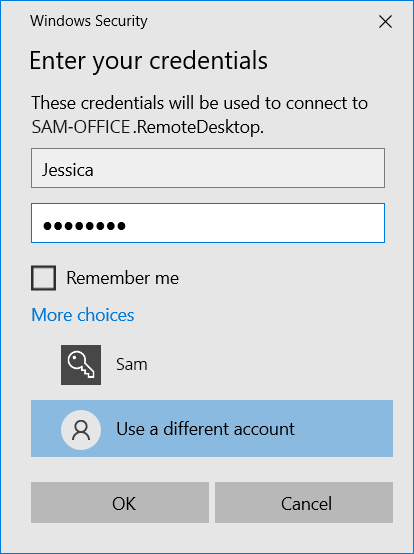
Note: You can use multiple computers / Remote Desktop viewers to connect to a computer simultaneously.
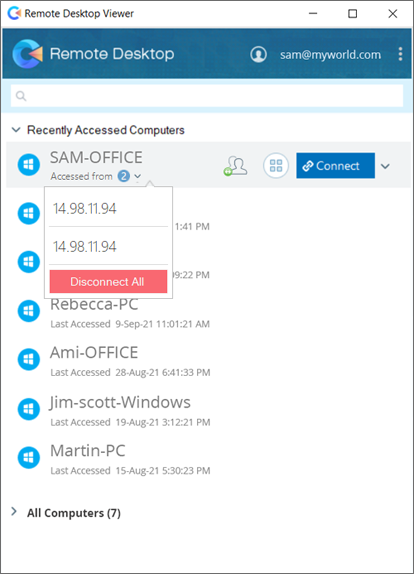
To connect to an application installed on your remote computer,
- Sign in to your Remote Desktop account via Remote Desktop viewer.
- Click
 corresponding to the required online computer or server.
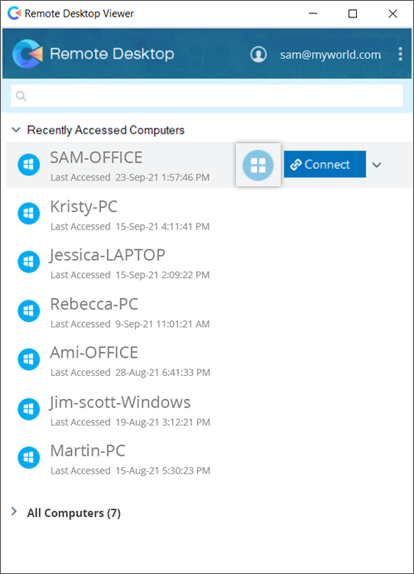
- Enter the name of the remote application in the search bar or scroll down to find it. Click the application to
launch it.
Alternatively, enter the name or path of the remote application in the field below and click 'Launch App'.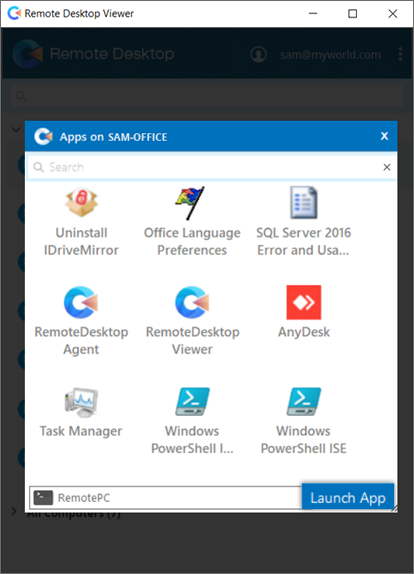
- Enter your system credentials and click 'OK' to connect. You will be connected to the remote application.
Alternatively, to switch the default user account, click 'More choices', select 'Use a different account', enter the system credentials of the remote device, and click 'OK'.
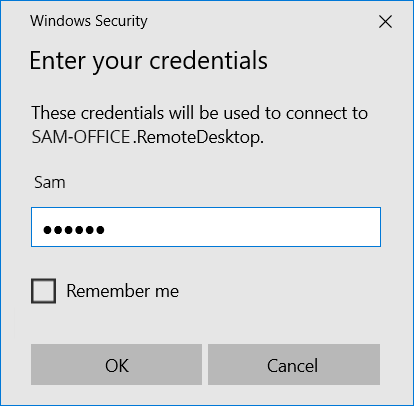

To rename a remote computer,
- Sign in to your Remote Desktop account via Remote Desktop viewer.
- Click
 corresponding to the computer you want to rename and click 'Rename'.
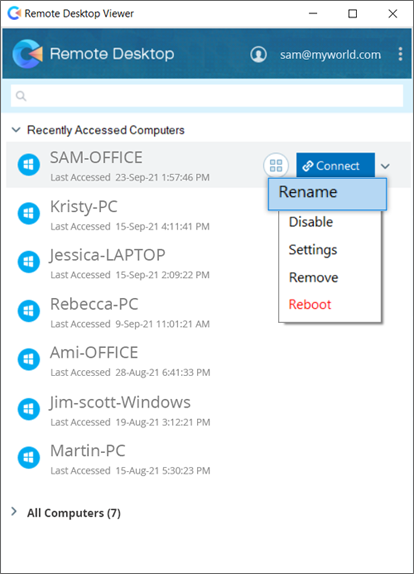
- Enter the new name for your remote computer.
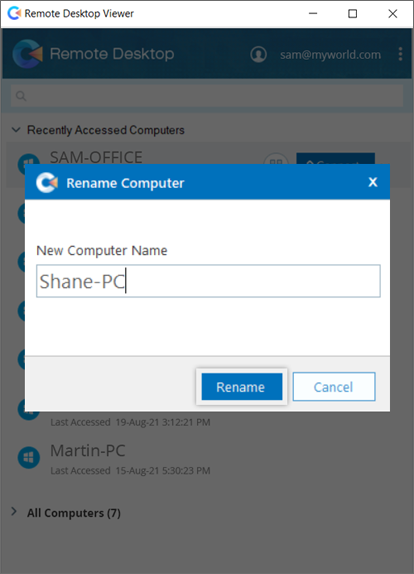
- Click 'Rename'.
To remove a remote computer,
- Sign in to your Remote Desktop account via Remote Desktop viewer.
- Click the
 corresponding to the computer you want to remove and click 'Remove'.
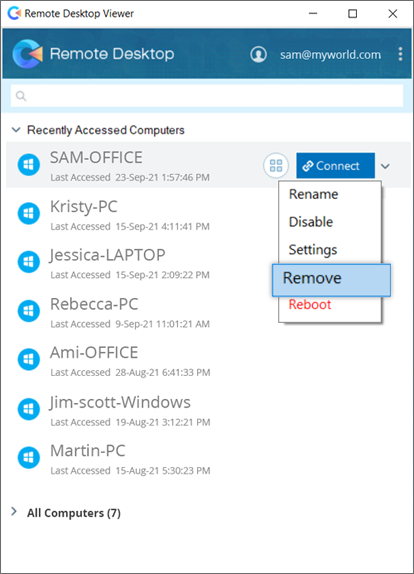
- Click 'Yes' to proceed.
To disable remote access to a computer,
- Sign in to your Remote Desktop account via Remote Desktop viewer.
- Click
 corresponding to the computer you want to disable and click 'Disable'.
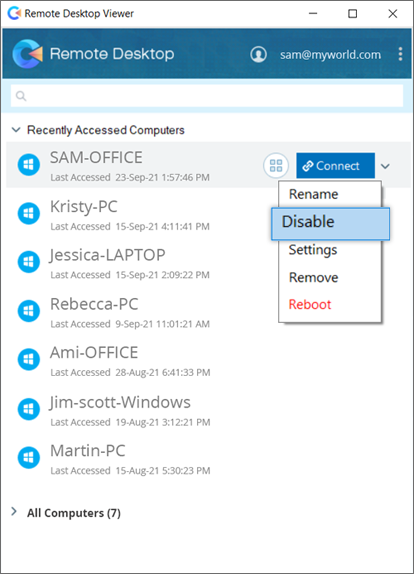
- Click 'Yes' to proceed. On disabling a computer, you will no longer be able to access it.
You can enable remote access to the computer at any time by clicking 'Enable' in the drop-down menu. The computer will be enabled for remote access.
Yes, once you are connected to your remote computer, you can easily share files and folders between your local and remote computers. Remote Desktop lets you copy and paste multiple files / folders between your local and remote computer during an ongoing session.
Yes, you can transfer files / folders between the Windows computers added to your account and any local Mac system. However, you cannot configure Mac and Linux computers for remote access.
Yes, you can play music and watch videos on the remote computer from your local computer. You can even run programs and use software installed on your remote computer.
Yes, if your remote computer has multiple monitors, the Remote Desktop viewer allows you to view and switch between the multiple screens.
To work on multiple remote monitors,
- Sign in to your Remote Desktop account via Remote Desktop viewer.
- Click
 corresponding to the required computer.
- Click 'Settings'.
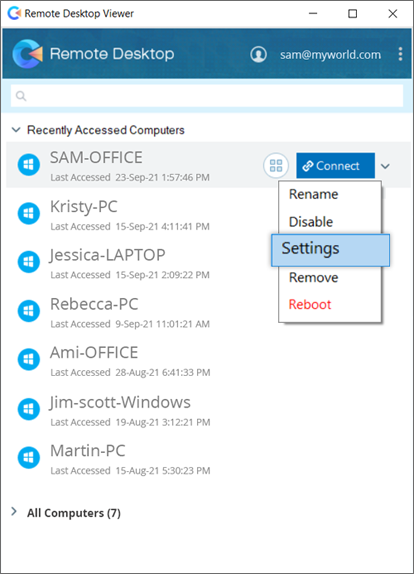
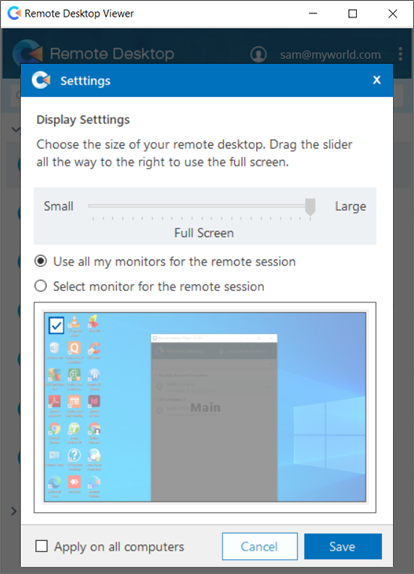
- Select the 'Use all my monitors for the remote session' checkbox and click 'Save'. Also, select 'Apply on all computers' to enable multi-monitor features during all remote sessions.
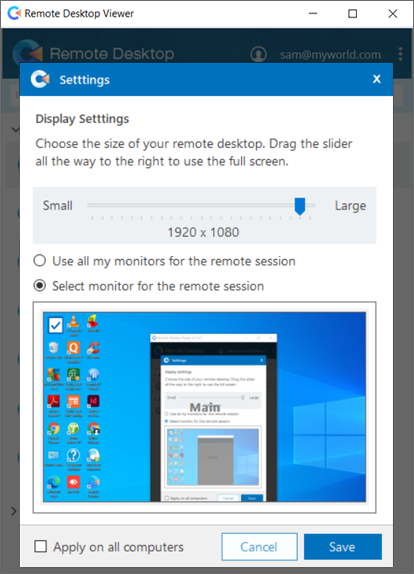
Alternatively, use the 'Select monitor for the remote session' option to work on a specific monitor.
To restart a remote computer,
- Sign in to your Remote Desktop account via Remote Desktop viewer.
- Click
 corresponding to the required computer.
 - Select 'Reboot' and click 'Yes' to confirm.
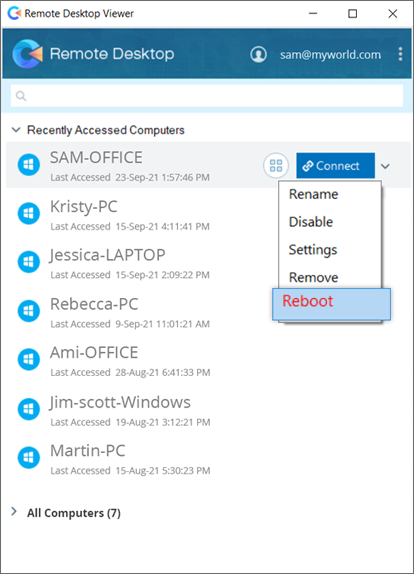
Your computer will go offline briefly, but once it is online again and ready for remote connection, its status will change to 'online'. Refresh the computer list manually to see the change.
The Wake-on-LAN feature in Remote Desktop allows you to wake up your offline remote computers for establishing a connection from anywhere.
Read about the hardware requirements and settings configuration needed to successfully use the WOL feature on Windows computers.
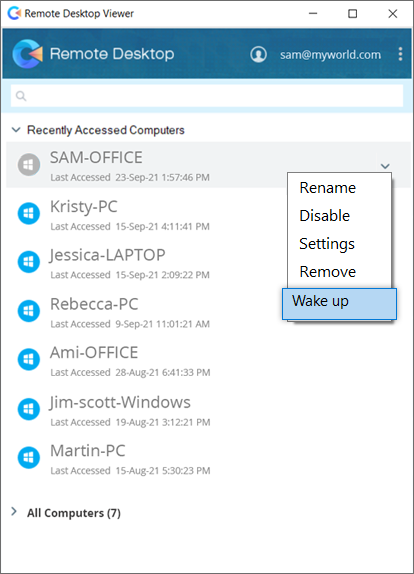
To wake up an offline remote computer,
- Sign in to your Remote Desktop account via Remote Desktop viewer.
- Click
 corresponding to the required offline computer and select 'Wake Up'.
 - Click 'OK' to confirm.
Note: To successfully wake up an offline computer, at least one of the other computers added to your Remote Desktop account must be online and on the same LAN.
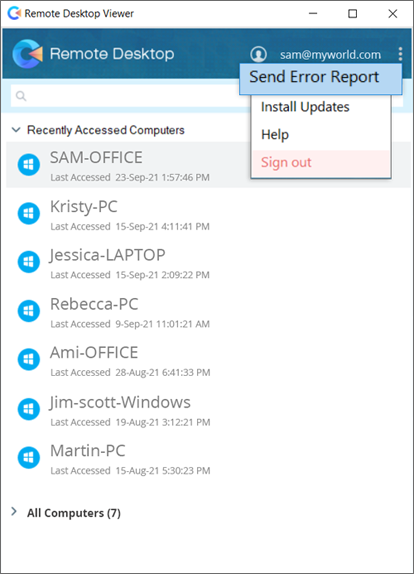
Yes, you can send the error reports directly from the Remote Desktop viewer.
To send an error report,
- Click
 on the top right corner.
 - Click 'Send Error Report'.
- Enter your email address associated with the Remote Desktop account.
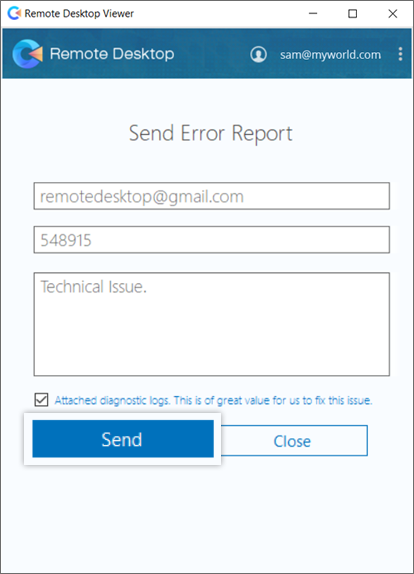
- Enter your contact number and type your issue / query or feedback.
- Click 'Send'. The error report will be sent to the Remote Desktop support team.
To uninstall Remote Desktop viewer,
- Click
 .
. - Locate the Remote Desktop Viewer from the list of applications.
- Right-click on the Remote Desktop viewer and click 'Uninstall'.
You will be redirected to 'Control Panel'. - Right-click on 'Remote Desktop viewer' and select 'Uninstall'. The Remote Desktop viewer will be uninstalled from your computer.